Prune Damaged Worktrees
When working with Git worktrees, it is common for entries to become orphaned or damaged—for example, if a folder is deleted in the terminal, moved in your operating system’s file manager without using git worktree move, or stored on a detached external drive.
Standard Git CLI provides git worktree prune, which unconditionally deletes all stale worktree metadata without giving you an opportunity to review what is being removed. WorktreeWise replaces this with a Review-First Prune workflow that previews damaged records and requires explicit user confirmation before touching Git’s internal state.
Why Worktrees Need Pruning
Git stores administrative references for linked worktrees in .git/worktrees/. A worktree record becomes a candidate for pruning when:
- Folder Deleted Outside WorktreeWise: A developer deletes a worktree directory using
rm -rf, PowerShellRemove-Item, or the system Trash. Git still believes the worktree exists and blocks the checked-out branch from being checked out elsewhere. - Directory Relocated Manually: If a worktree directory is moved without running Git’s move command, the internal pointer file (
.git) breaks. - Branch Replaced or Deleted: The branch associated with the worktree was deleted or forcefully rewritten elsewhere.
- Temporary Mount Unavailable: A worktree residing on a temporary network share or external drive is unmounted.
The Review-First Prune Workflow
WorktreeWise ensures you never lose work accidentally by performing an audit before pruning:
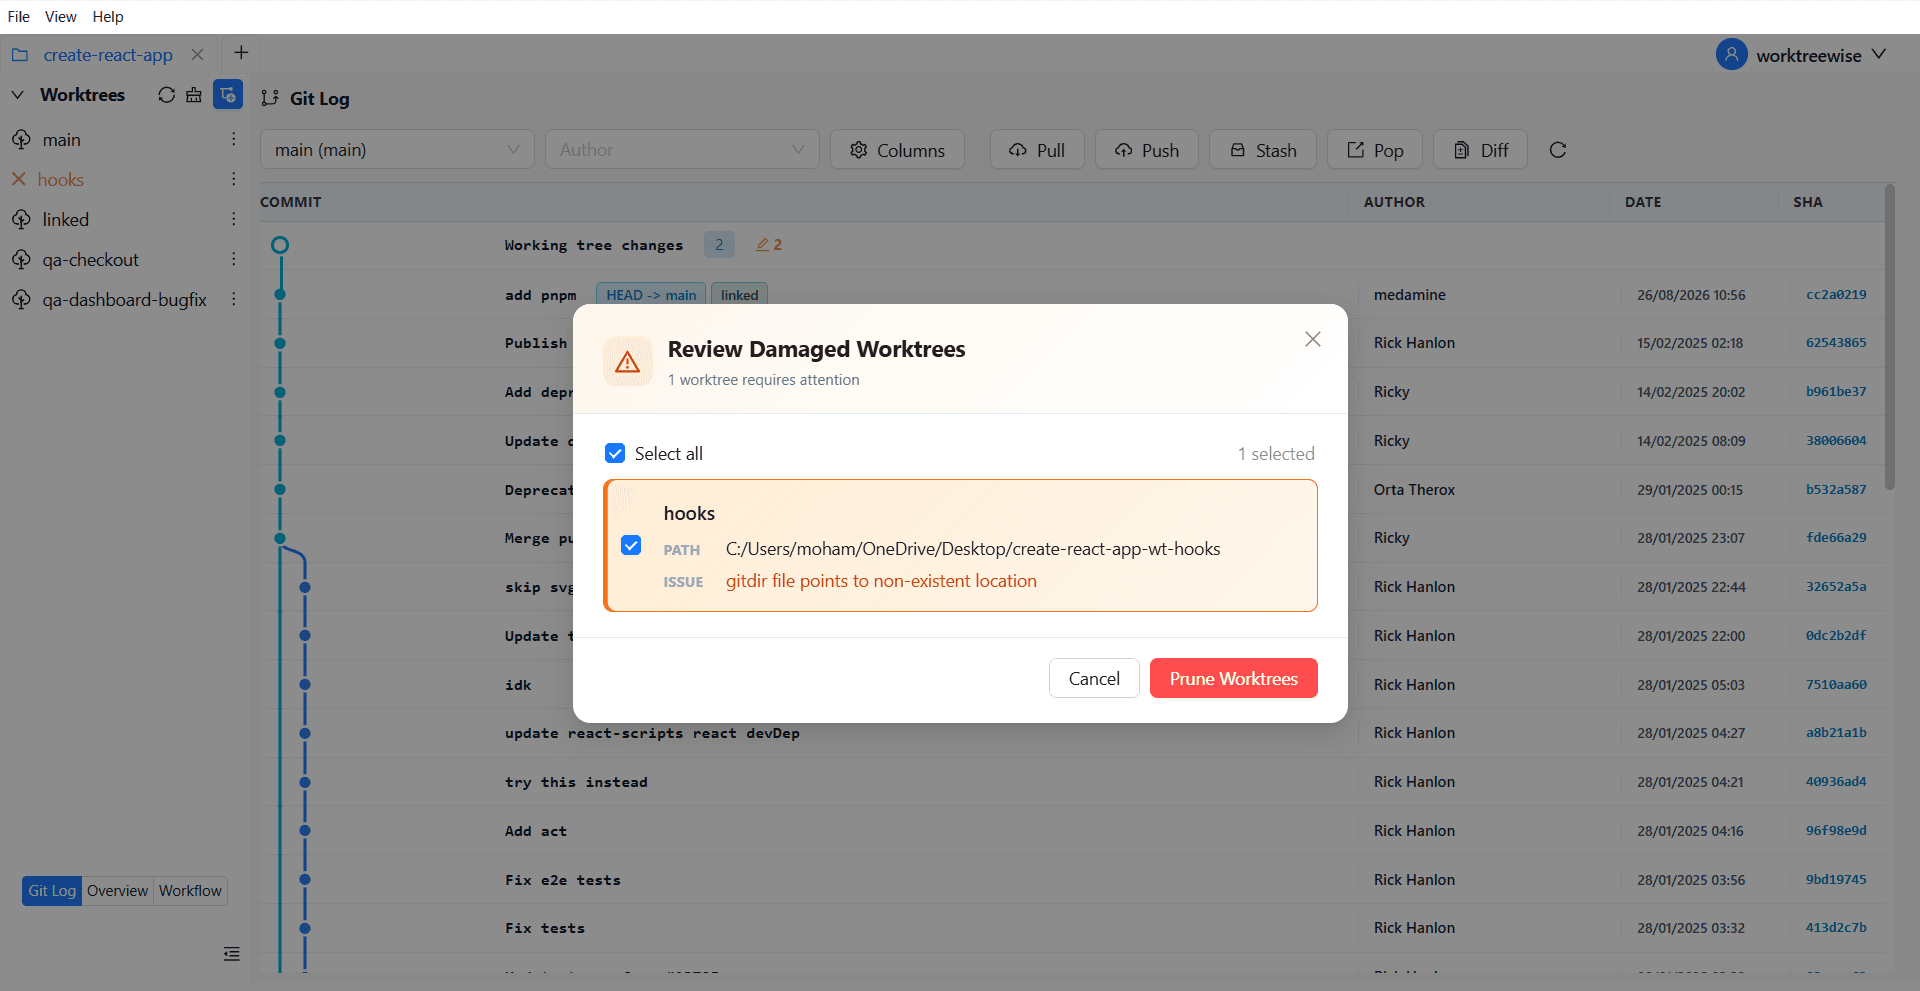
Step 1: Open Prune Review
- Click the Broom icon (🧹) in the Worktrees panel toolbar.
- Or press the keyboard shortcut Shift + P.
If all worktrees in your repository are healthy and fully reachable, the Broom icon remains disabled, confirming that no cleanup is necessary.
Step 2: Inspect Damaged Worktrees
WorktreeWise runs a non-destructive dry run (preview-prune-worktrees) and opens a modal dialog showing:
- Worktree Name: The registered name of the worktree.
- Path: The filesystem path where the worktree was expected to reside.
- Specific Reason: The exact reason Git considers the worktree damaged (e.g.
Directory does not exist,Missing gitdir administrative file).
Step 3: Granular Selection
Unlike CLI commands that delete everything at once, WorktreeWise allows you to choose what to prune:
- Check the box next to specific worktrees you want to purge.
- Leave entries unchecked if you plan to restore the directory or reconnect a drive.
Step 4: Confirm Cleanup
Click Prune Worktrees. WorktreeWise instructs Git to remove only the selected administrative references from .git/worktrees/.
Once pruned:
- Healthy worktrees and their branches remain completely intact.
- Branches previously locked by the missing worktree become available again for checkout.
- The Worktree list and Overview dashboard update automatically.