Create a Git Worktree
To create a Git worktree in WorktreeWise, you have three options:
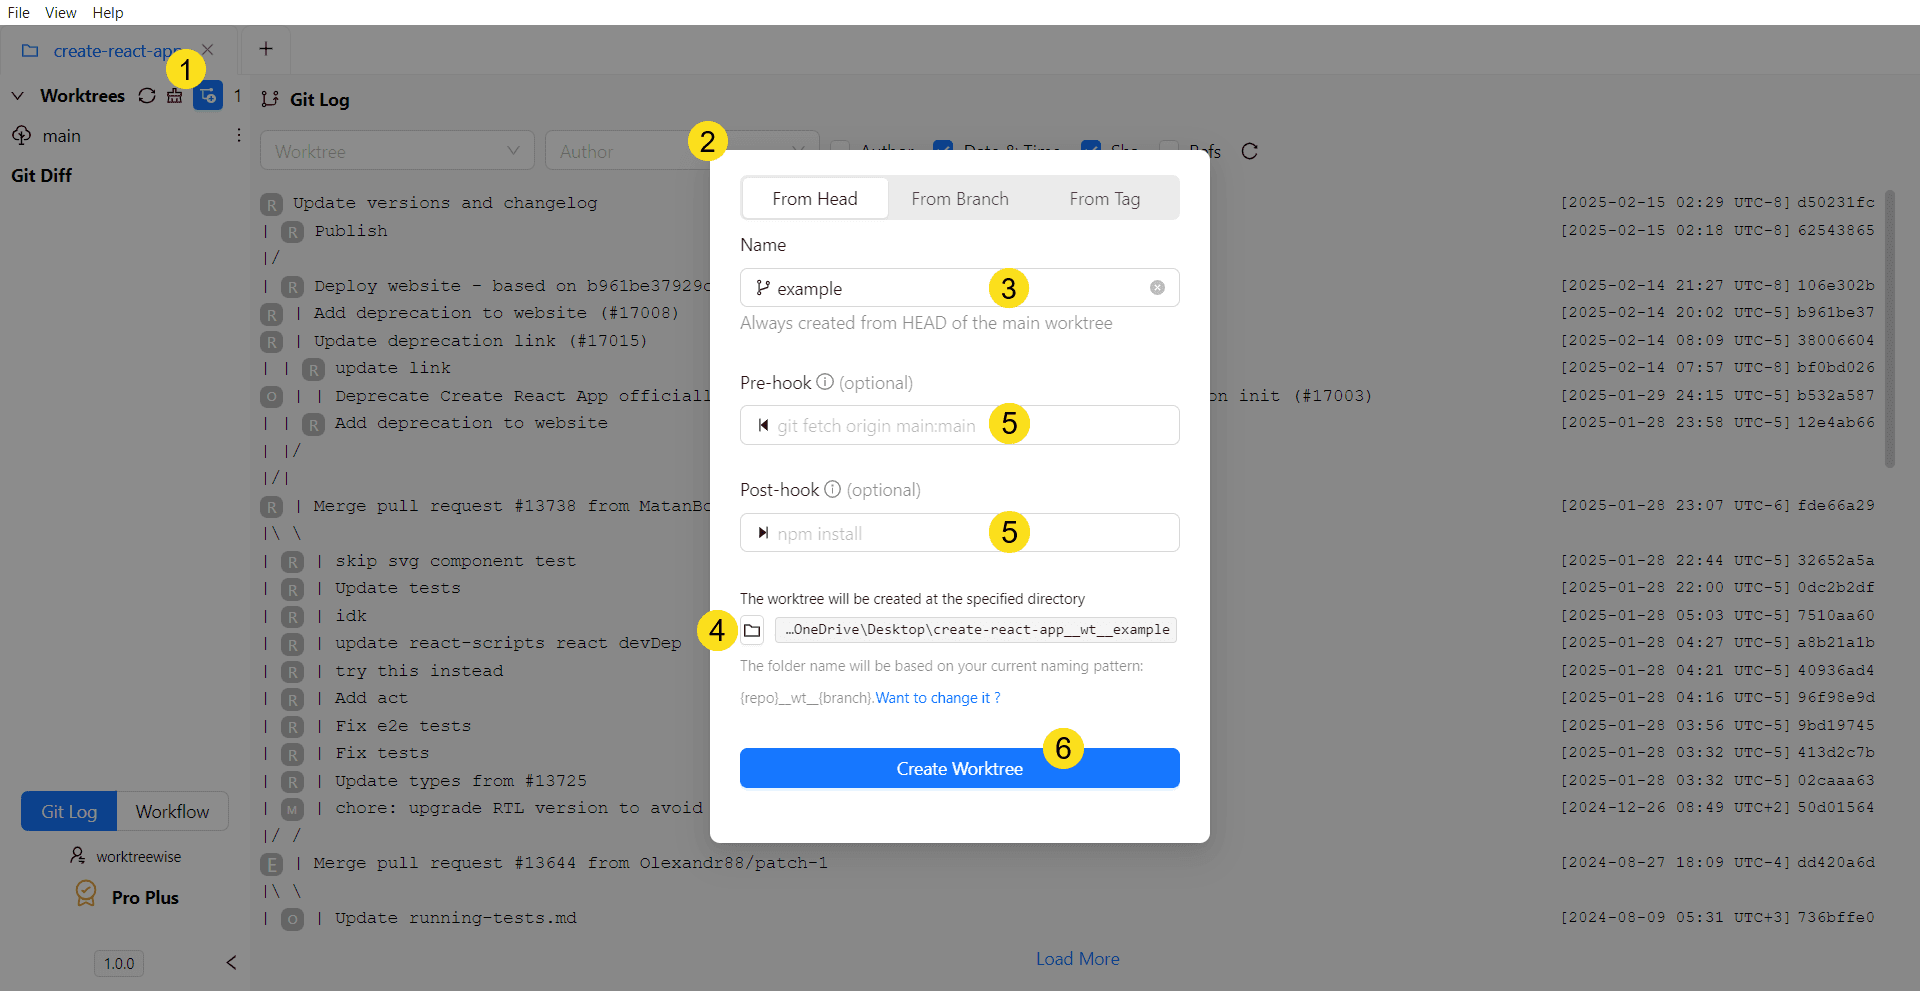
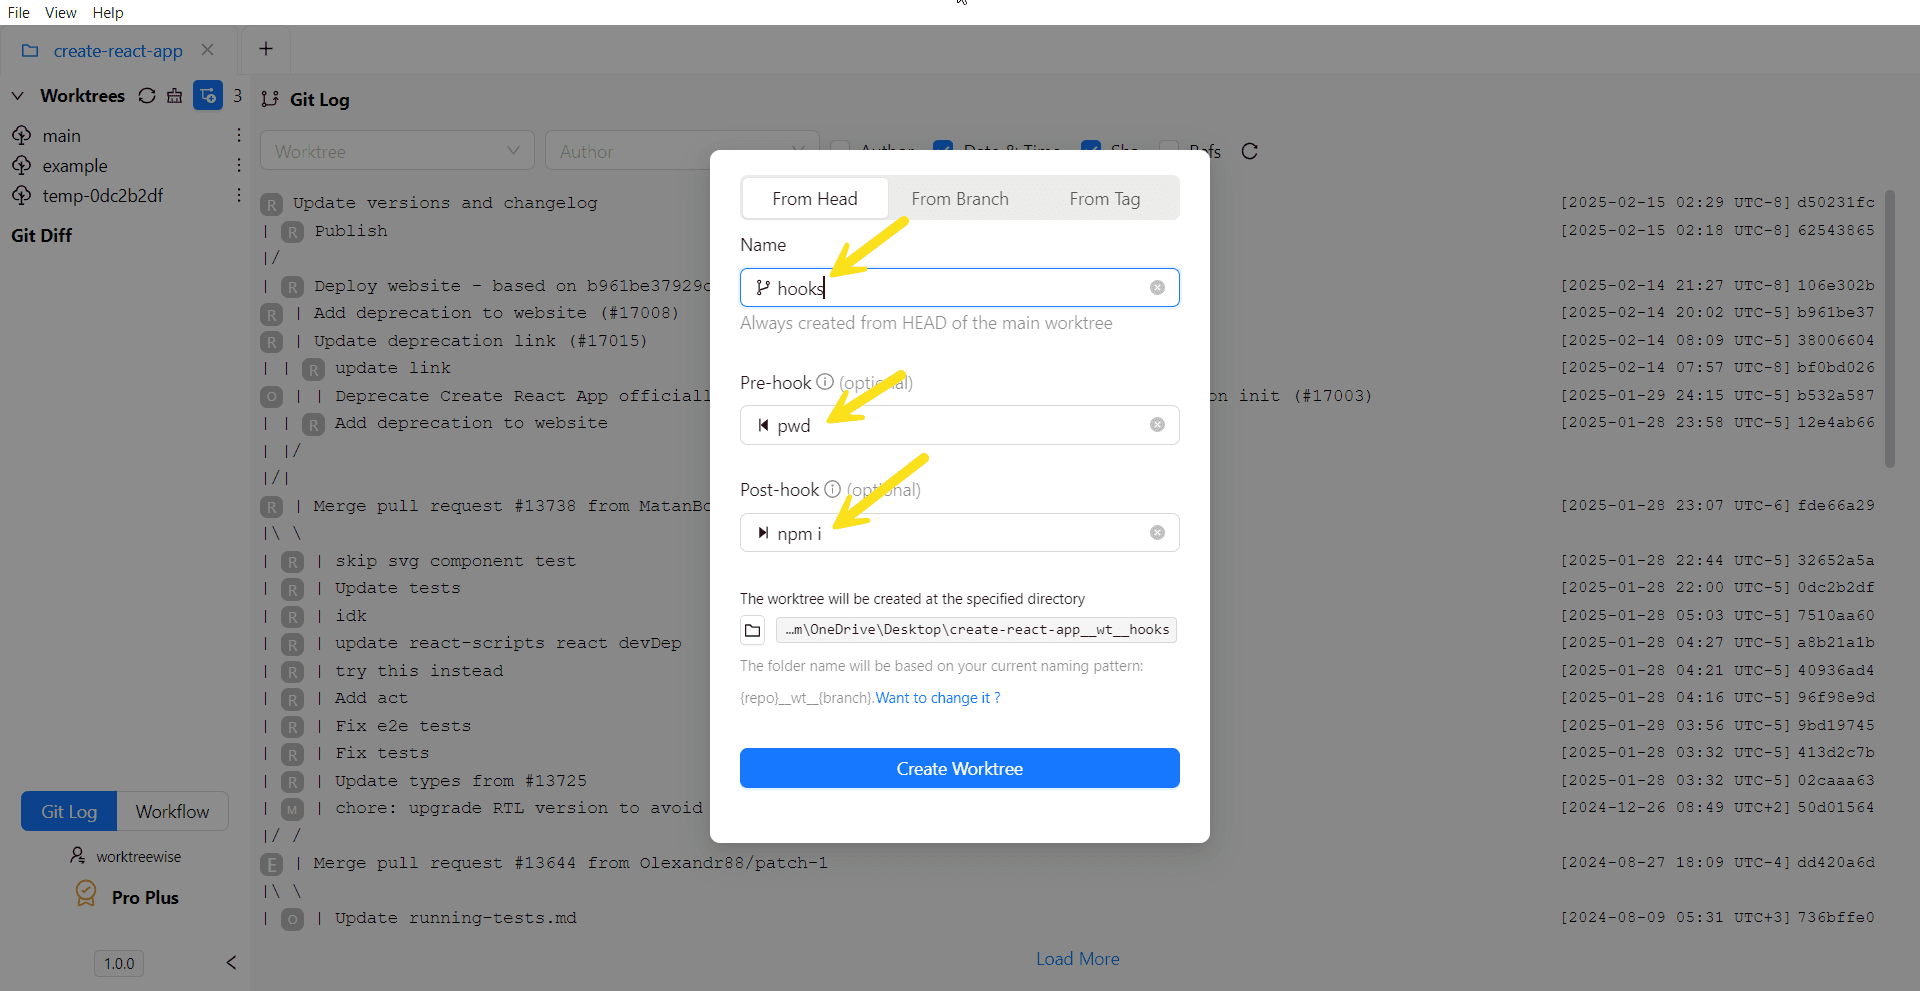
From HEAD
To create a worktree from HEAD, follow these steps:
- Click on the Add New Worktree button.
- A new popup will appear, presenting the three creation modes in a tab component. By default, From HEAD is selected.
- Enter the worktree name (this will also be the name of the branch).
- Choose the path where the worktree will be created.
- (Optional) Skip or configure pre/post hooks.
- Click the Create Worktree button.
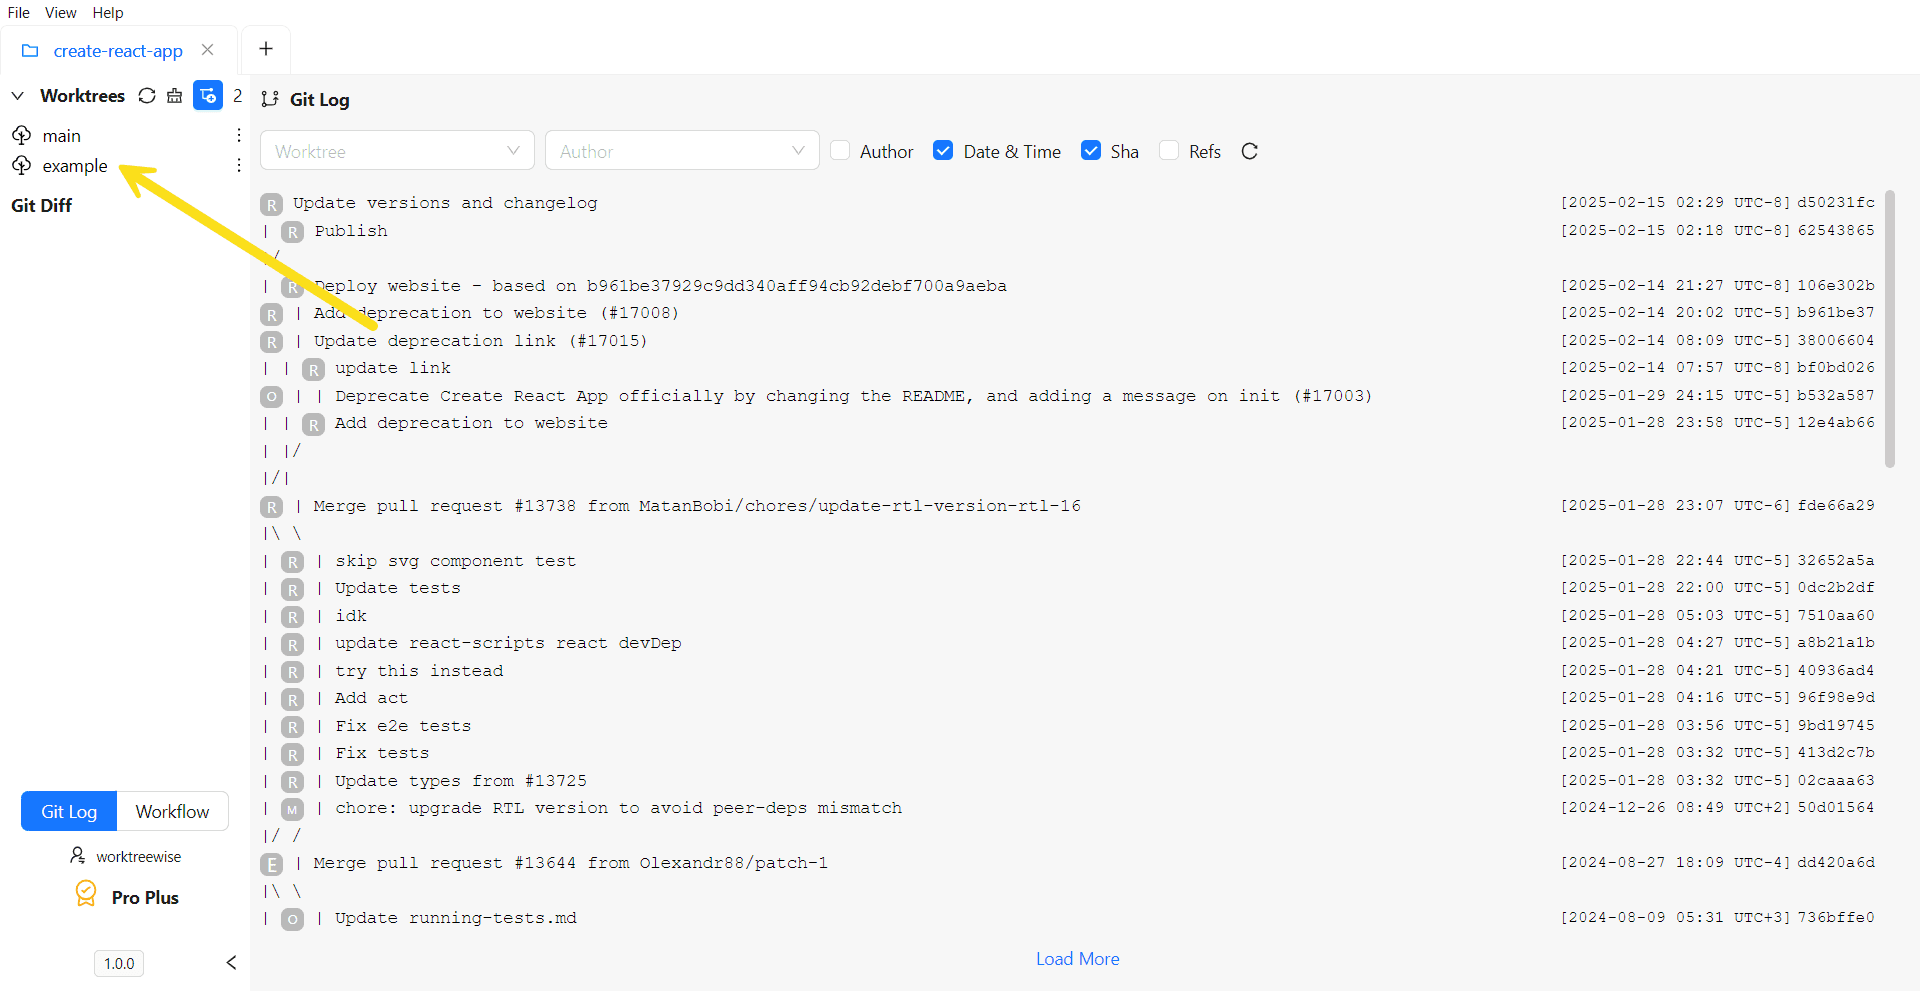
The newly created worktree will now appear in the list of worktrees.
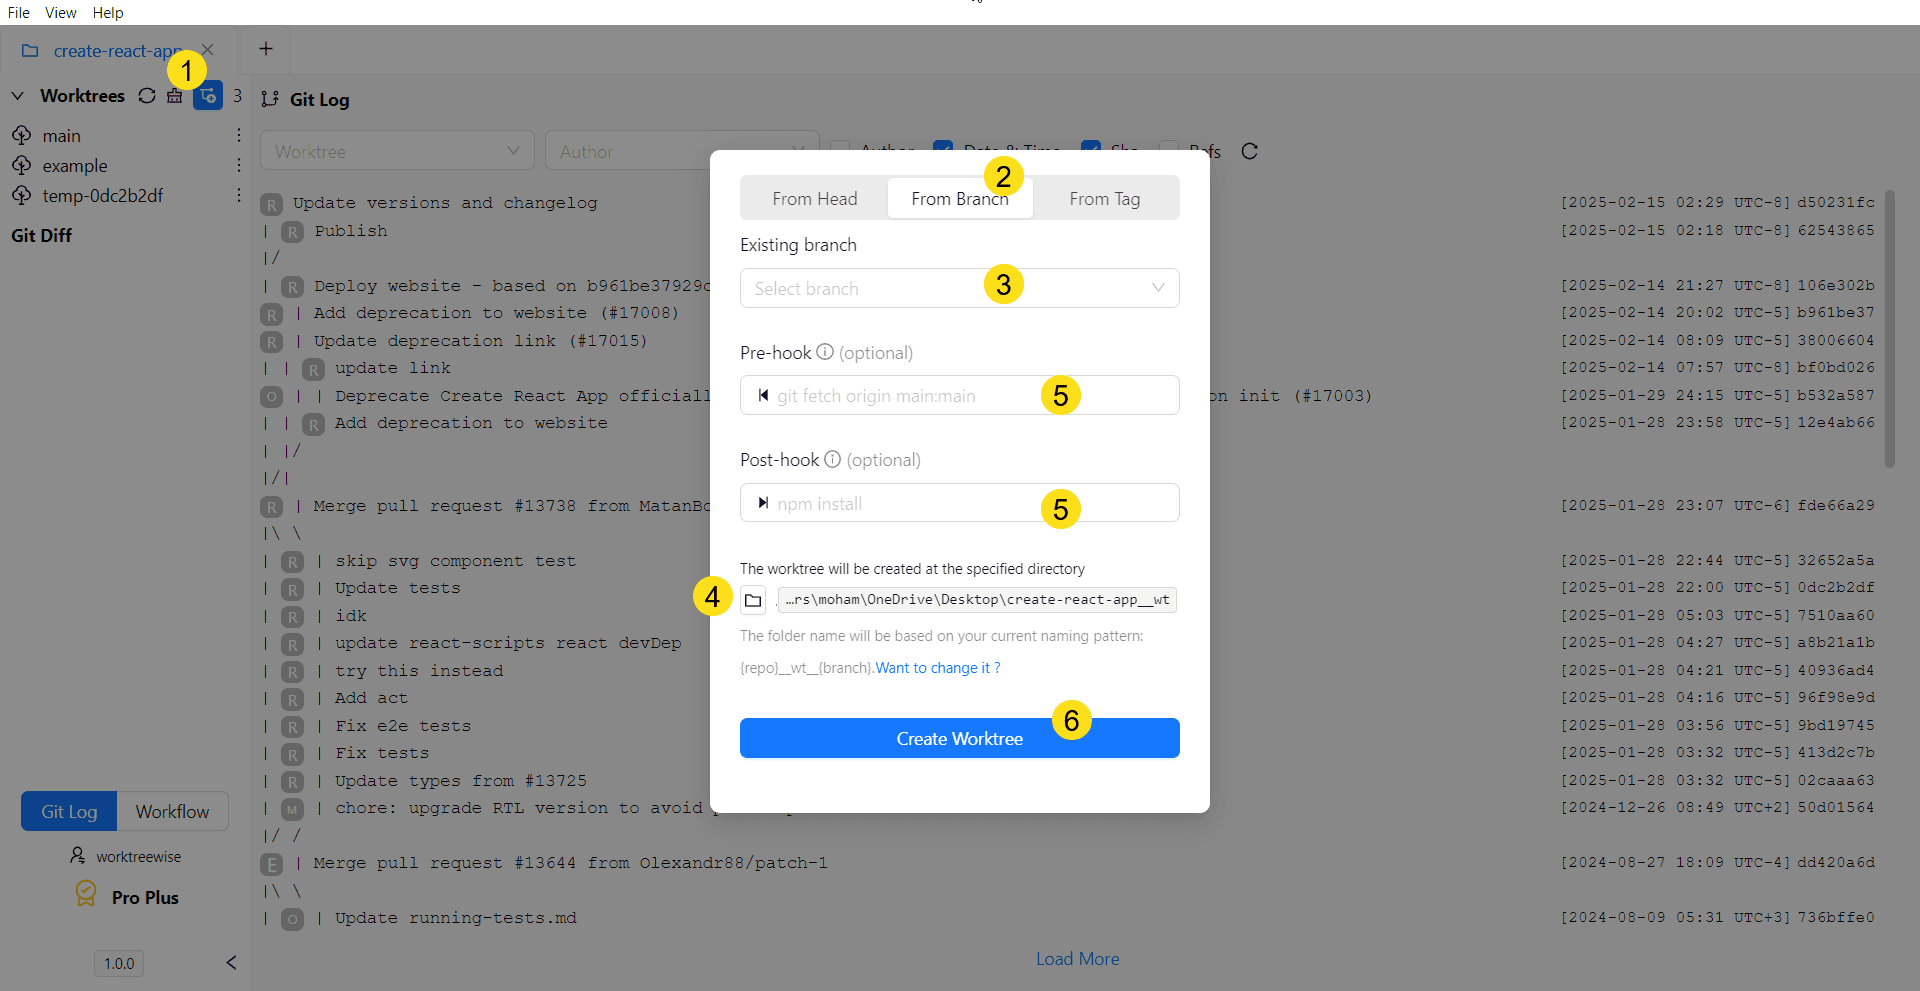
From an Existing Branch
To create a worktree from an existing branch, follow these steps:
- Click on the Add New Worktree button.
- Click on the From Branch tab.
- Select an existing branch (the worktree name will be the same as the selected branch).
- Choose the path where the worktree will be created.
- (Optional) Skip or configure pre/post hooks.
- Click the Create Worktree button.
The newly created worktree will now appear in the list of worktrees.
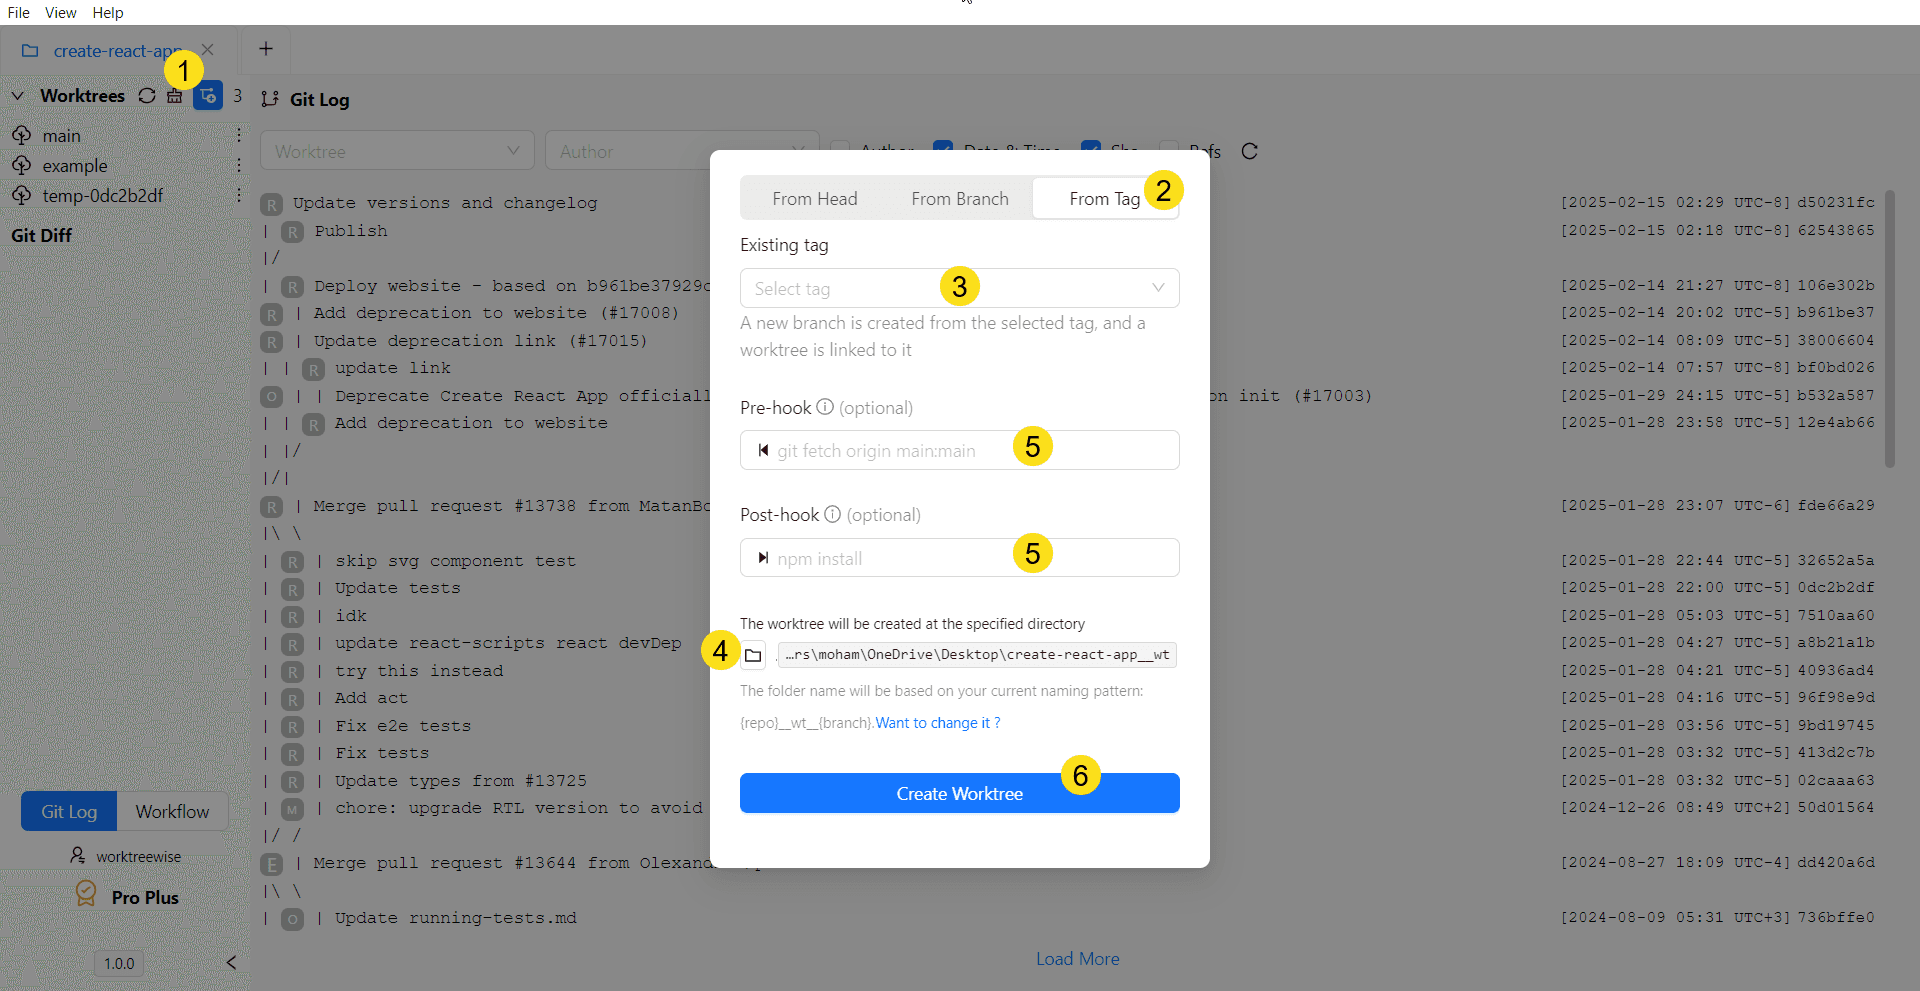
From a Git Tag
To create a worktree from a Git tag, follow these steps:
- Click on the Add New Worktree button.
- Click on the From Tag tab.
- Select a tag (the worktree name will be the same as the tag).
- Choose the path where the worktree will be created.
- (Optional) Skip or configure pre/post hooks.
- Click the Create Worktree button.
The newly created worktree will now appear in the list of worktrees.
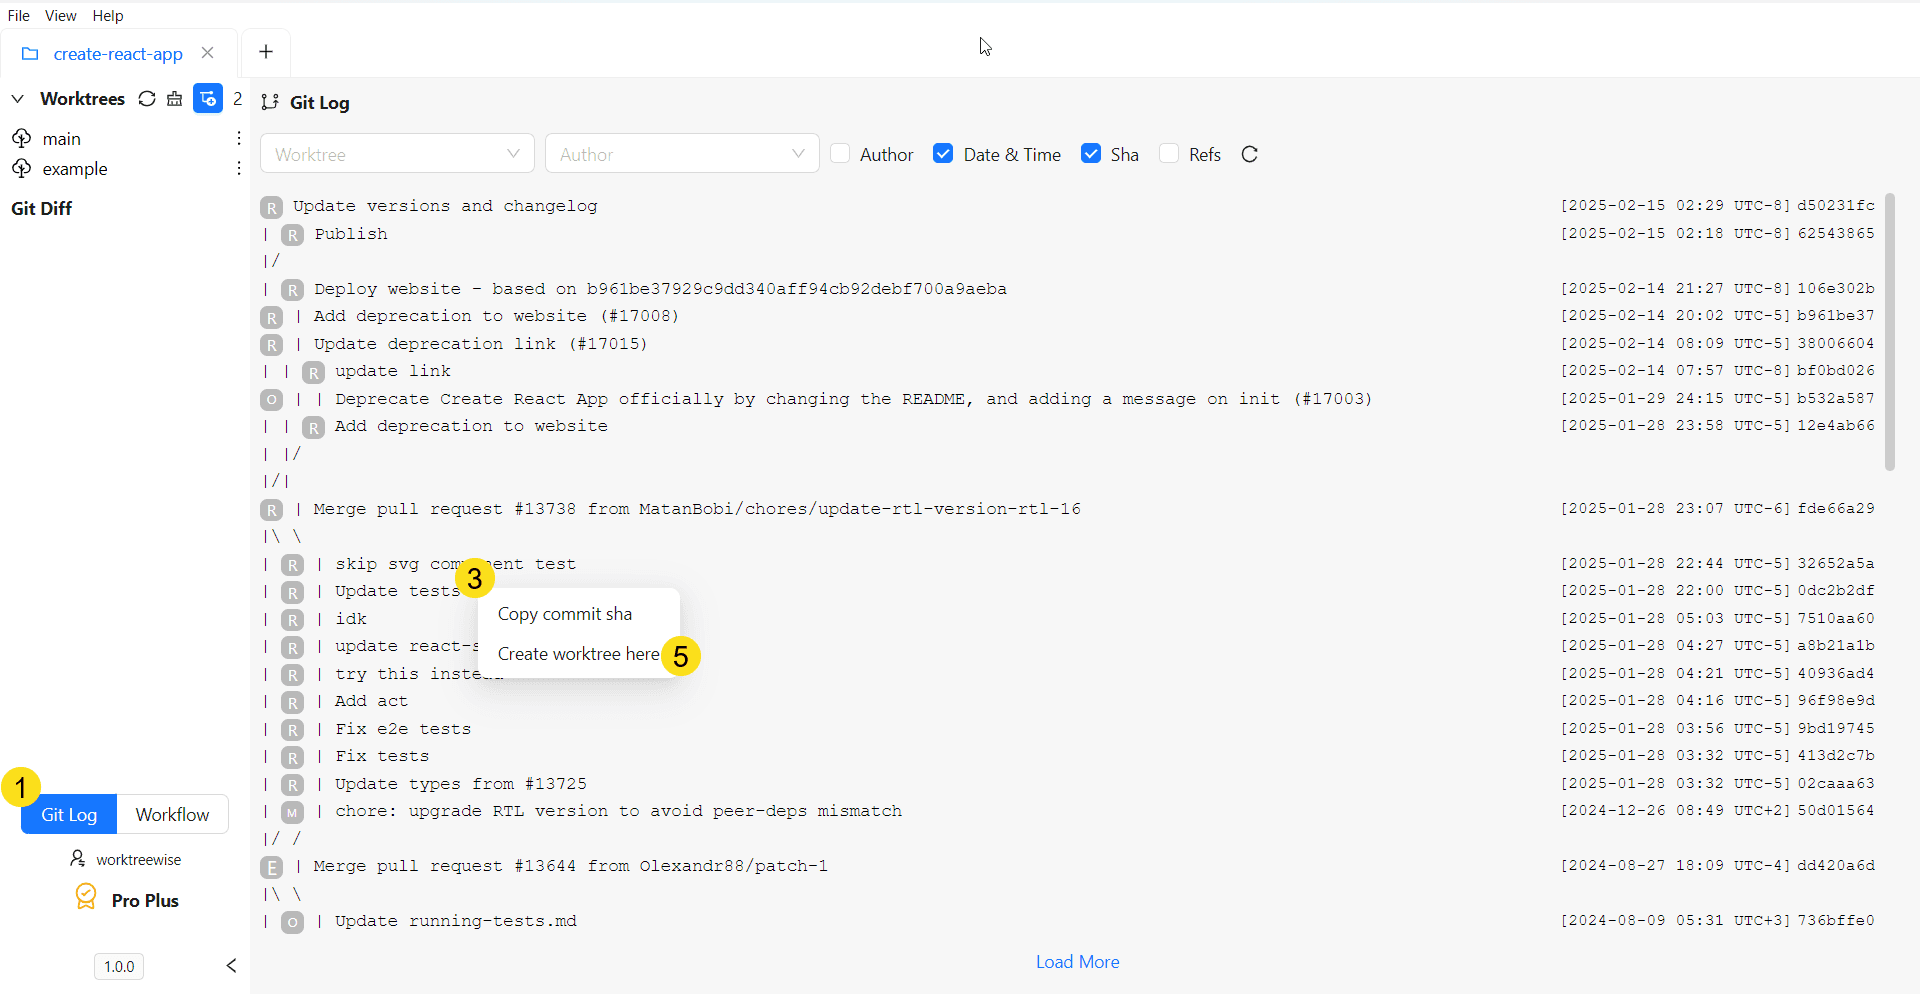
From a Git Commit
To create a worktree from a specific Git commit, follow these steps
- Open the Git Log view in WorktreeWise.
- Locate the commit you want to create a worktree from.
- Right-click on the commit entry.
- A context menu will appear with two options:
- Copy commit sha
- Create worktree here
- Click on Create worktree here.
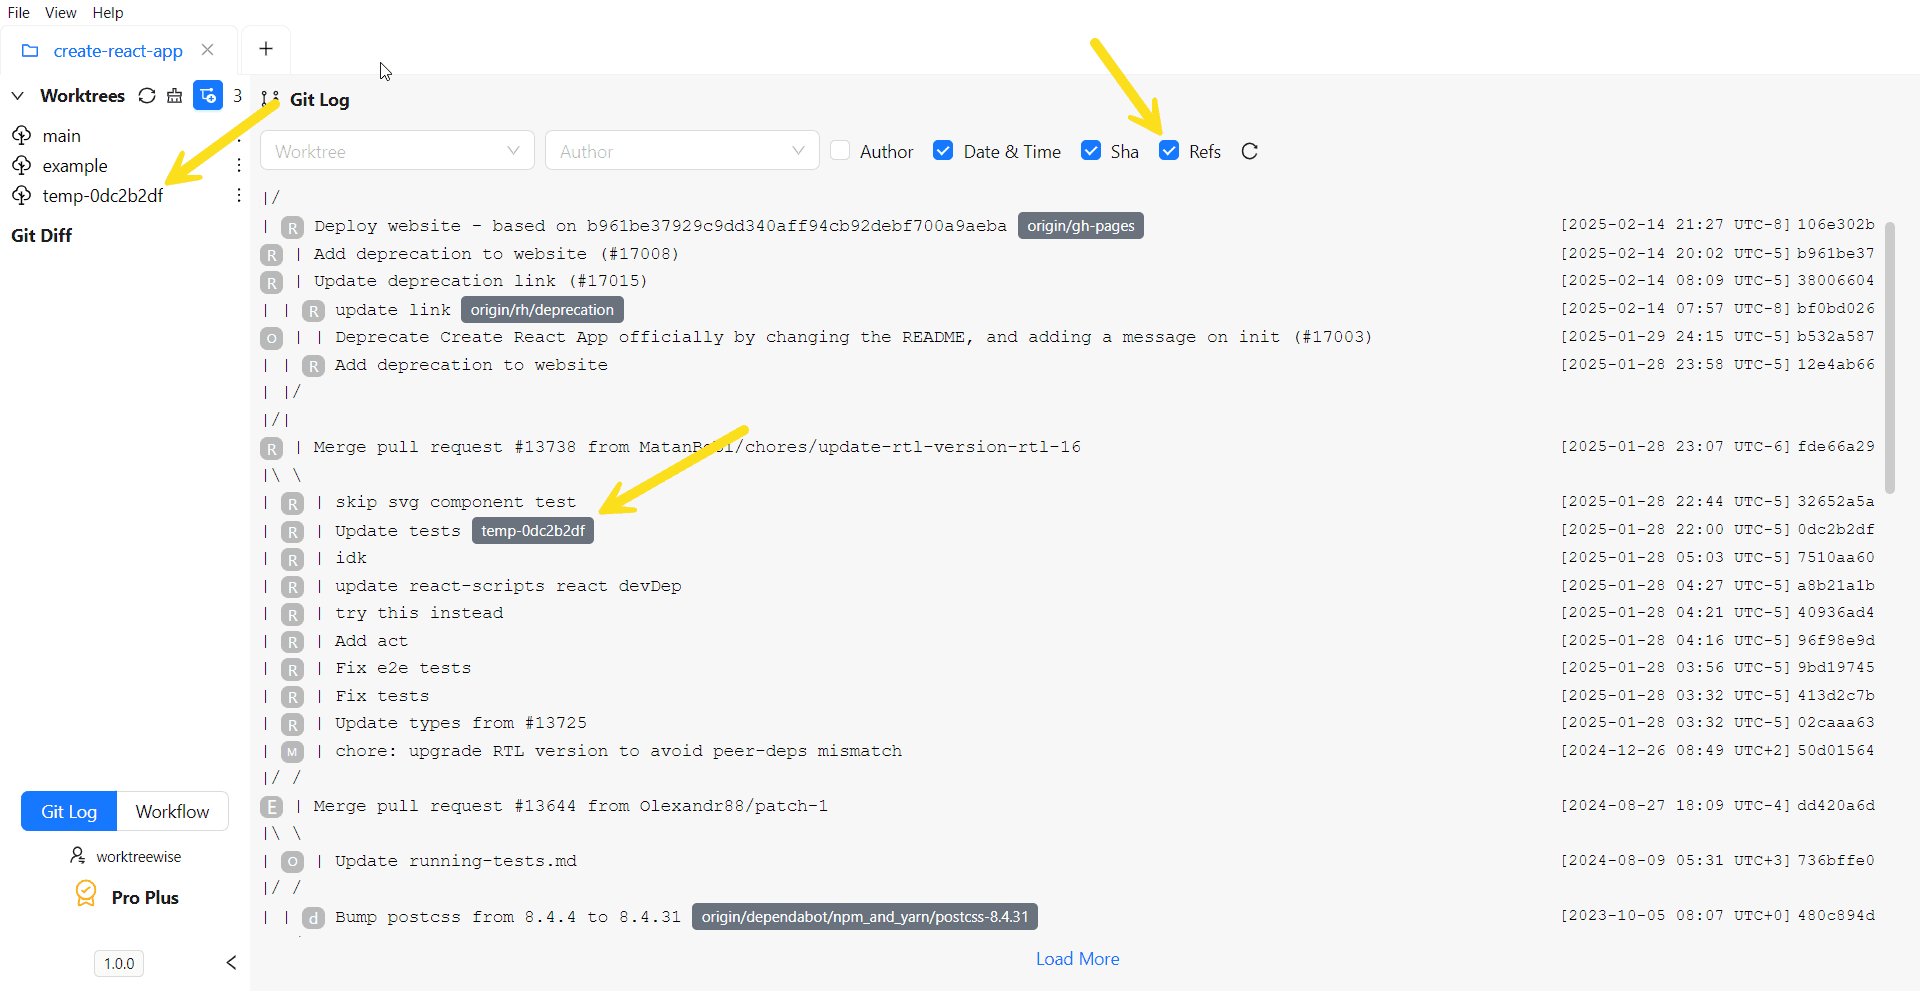
WorktreeWise will then create a new worktree based on that commit.
Hooks
When creating a new worktree in WorktreeWise, you can define hooks that will be executed automatically before and after the worktree creation. This allows you to automate setup tasks, run checks, or initialize environments.
Types of Hooks
-
Pre-hook: Runs before the new worktree is created. Executed in the main worktree. Example: checking dependencies, running tests, or cleaning cache.
-
Post-hook: Runs after the new worktree is created. Executed in the newly created worktree. Example: installing packages, running migrations, or starting services.
Adding Hooks
In the Create Worktree dialog, you can add commands in the Pre-hook and Post-hook fields:
- Each hook accepts a shell command.
- Multiple commands can be chained using
&&. - Hooks run in the context of the selected shell (examples of known shells and their paths are provided in the dialog for guidance).
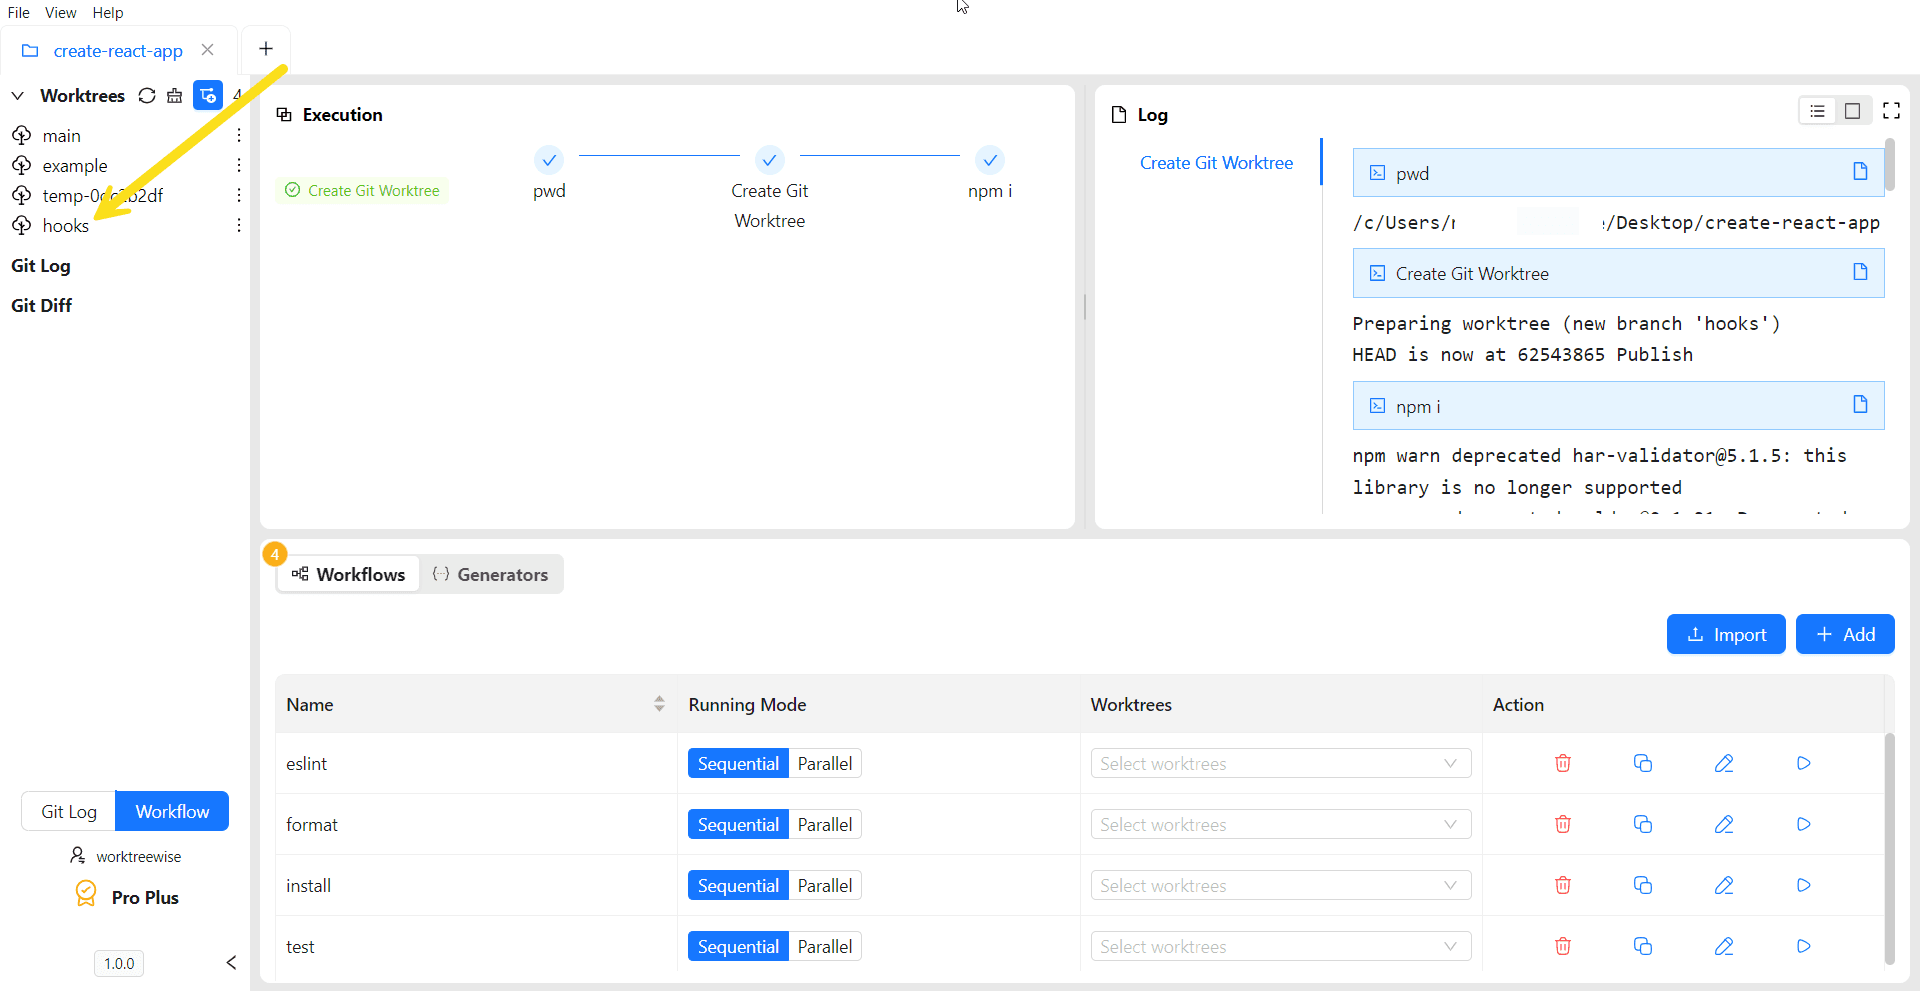
Execution and Logs
Once the worktree is created, the Execution panel shows the step-by-step process:
- Run Pre-hook
- Create Git Worktree
- Run Post-hook
The Logs panel records the detailed output of each step, making it easy to debug and verify that your hooks executed correctly.
Example
Here’s an example workflow using hooks:
- Pre-hook: Run
pwdto confirm the current directory in the main worktree. - Post-hook: Run
npm installin the new worktree to set up dependencies.
Execution order:
pwd               # Pre-hook in main worktree
Create Git Worktree
npm install       # Post-hook in new worktree